


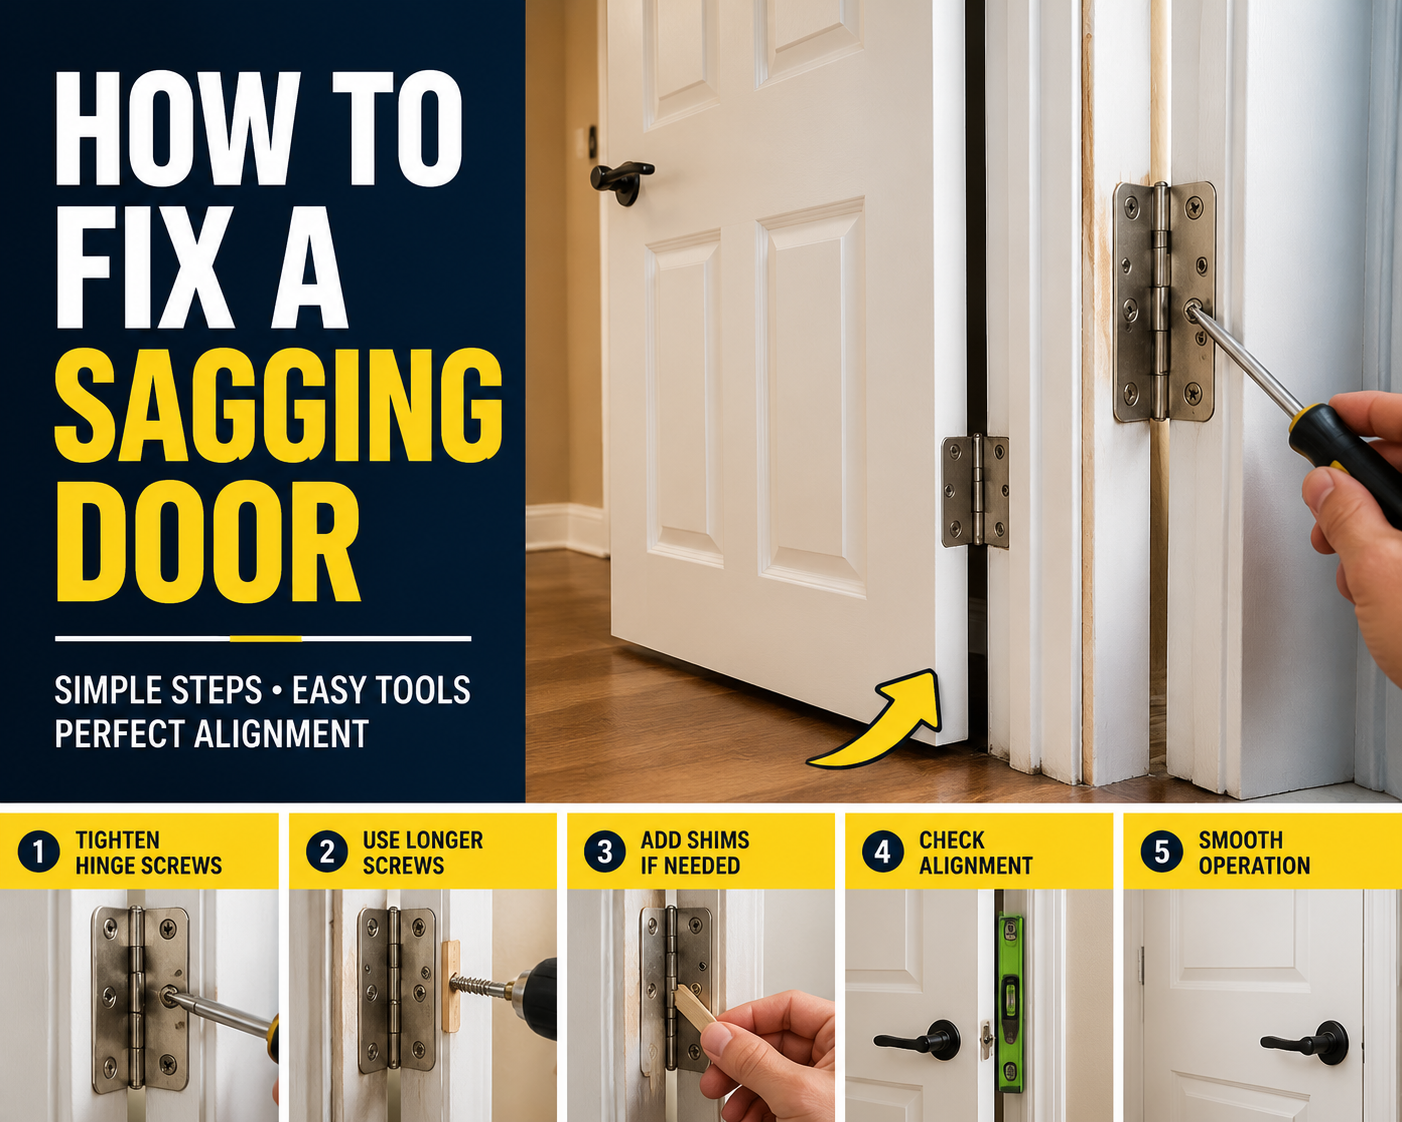
A sagging door is one of those small home problems that quickly becomes annoying. It starts with a slight rub on the floor or frame, then suddenly you’re forcing it shut every time. The good news is that learning how to fix a sagging door is usually simple, and you don’t need advanced tools or professional help in most cases.
In many homes, the issue comes from loose hinges, worn screws, or a shifted door frame. As one experienced carpenter once said, “A sagging door is rarely broken—it’s usually just tired hardware asking for attention.” That means a few small fixes can bring it back to perfect working condition.
This guide walks you through everything in a clear, practical way so you can confidently handle how to fix a sagging door without guesswork.
Why Doors Start Sagging in the First Place
Before jumping into how to fix a sagging door, it helps to understand why it happens. Most sagging doors don’t fail suddenly—they slowly shift over time.
Common reasons include:
- Loose hinge screws that slowly pull out of wood
- Heavy doors stressing weak frames
- Seasonal humidity expanding or shrinking wood
- Worn-out hinges losing alignment
- Poor installation from the start
A simple analogy: think of a door like a hanging picture frame. If one corner loosens even slightly, the whole structure tilts. That’s exactly what happens with a sagging door.
One homeowner described it well: “It didn’t break—it just leaned a little more every month until it started scraping the floor.”
Understanding this makes how to fix a sagging door much easier because you’re not repairing damage—you’re restoring alignment.
Tools You’ll Need Before You Start
To properly learn how to fix a sagging door, you don’t need expensive tools. Most items are already in a basic home toolkit.
Here’s what you may need:
- Screwdriver (Phillips or flathead depending on screws)
- Drill (optional but helpful)
- Longer screws (2–3 inches recommended)
- Wood glue or wood filler
- Wooden shims or cardboard pieces
- Sandpaper or hand planer
- Spirit level (optional but useful)
A pro tip often shared by builders: “Most door fixes fail not because they’re hard, but because people reuse weak screws.” So having stronger screws is often the real solution in how to fix a sagging door.
Step 1: Tighten All Hinge Screws First
The simplest step in how to fix a sagging door is tightening loose screws. This alone solves many cases.
Start by checking all hinges:
- Open the door fully
- Inspect top, middle, and bottom hinges
- Tighten every screw firmly
If screws keep spinning without tightening, the wood is stripped. That’s very common.
Quick fix options:
- Replace short screws with longer 2–3 inch screws
- Insert a wooden matchstick or toothpick with wood glue into the hole
- Re-screw once dry
A small change like this can immediately lift a sagging door back into alignment.
One carpenter’s advice fits perfectly here: “A tight hinge is the backbone of a straight door.”
Step 2: Replace Short Screws with Longer Ones
If tightening doesn’t solve it, the next step in how to fix a sagging door is upgrading screws.
Short screws only grip the thin door frame. Over time, they loosen again. Longer screws anchor into the wall stud, giving real strength.
How to do it:
- Remove one hinge screw at a time
- Replace it with a 2–3 inch screw
- Tighten slowly but firmly
- Repeat for top hinge first (most important)
Focus on the top hinge—it carries most of the door’s weight. Fixing it alone often corrects alignment instantly.
Think of it like this: a door is like a hanging weight; if the top support is weak, everything drops.
This step is one of the most effective solutions in how to fix a sagging door.
Step 3: Adjust or Add Shims Behind Hinges
If your door still sags, the frame may be slightly misaligned. This is where shimming helps in how to fix a sagging door.
Shims are thin pieces of wood or cardboard placed behind hinges to adjust position.
How to do it:
- Remove hinge screws carefully
- Insert a thin shim behind the hinge plate
- Reattach screws tightly
- Test door movement
A small shim can change the angle just enough to lift the door.
A useful quote here: “Precision fixes come from millimeters, not effort.”
This method is especially helpful when the door is rubbing at the top corner or dragging unevenly on the floor.
Step 4: Fix the Door That Rubs on the Floor
A common issue in how to fix a sagging door is scraping at the bottom. This happens when the door drops slightly on the hinge side.
Two main solutions:
Option 1: Lift via hinge adjustment
- Tighten or shim top hinge
- Check alignment repeatedly
Option 2: Trim bottom edge
- Mark the rubbing area
- Remove door from hinges
- Sand or plane the bottom edge
Trimming should always be the last option. Most of the time, hinge adjustment solves the issue without cutting anything.
A practical reminder: “Never cut first when alignment can fix it.”
Step 5: Repair Stripped Hinge Holes
Stripped screw holes are one of the biggest hidden problems in how to fix a sagging door.
When wood becomes weak, screws lose grip and the door slowly drops again.
Fix it properly:
- Remove screws completely
- Fill holes with wood glue + wooden sticks or dowels
- Let it dry fully
- Re-drill and refit screws
This creates a solid anchor again.
Without this step, sagging often returns within weeks. That’s why professionals always reinforce weak wood before finishing how to fix a sagging door repairs.
Step 6: Check Door Frame Alignment
Sometimes the issue is not the door—it’s the frame. In advanced cases of how to fix a sagging door, the frame itself shifts due to moisture or building settling.
Check for:
- Uneven gaps around the door
- Visible tilt in frame edges
- Door sticking at multiple points
Fix options include:
- Adding shims behind frame
- Re-securing frame screws
- Reinforcing weak joints with wood glue
One builder explains it simply: “A straight door cannot survive a crooked frame.”
Step 7: Plane or Sand the Door (Only if Necessary)
If all adjustments fail, you may need to slightly shave the door. This is the final step in how to fix a sagging door.
How to do it:
- Mark rubbing area clearly
- Remove door from hinges
- Use a hand planer or sandpaper
- Remove thin layer only
- Reinstall and test
Be careful not to remove too much material. Small adjustments are enough.
This step should always come after hinge and frame corrections.
Step 8: Adjust the Strike Plate for Smooth Closing
Sometimes even after fixing alignment in how to fix a sagging door, the latch doesn’t fit properly.
Fix it by adjusting strike plate:
- Loosen screws slightly
- Shift plate up/down or left/right
- Retighten once aligned
If needed, enlarge the strike hole slightly so the latch fits smoothly.
This ensures the door closes cleanly without force.
Preventing Future Sagging
Once you’ve learned how to fix a sagging door, prevention keeps it from happening again.
Simple habits:
- Check hinge screws every 6 months
- Avoid slamming doors
- Use quality hinges for heavy doors
- Keep wood dry and protected
- Lubricate hinges occasionally
As a maintenance expert says: “A well-maintained door never becomes a problem—it becomes part of the structure.”
Common Mistakes to Avoid
When working on how to fix a sagging door, avoid these errors:
- Using the same short screws again
- Ignoring top hinge pressure
- Cutting the door too early
- Fixing only one hinge
- Not checking frame alignment
These mistakes often make the problem worse instead of better.
When You Should Call a Professional
While most cases of how to fix a sagging door are DIY-friendly, some situations need expert help:
- Severe frame warping
- Rotting wood in door frame
- Structural movement in walls
- Heavy solid wood doors with major sag
If multiple fixes fail, it’s better to get a carpenter to realign the structure properly.
Final Thoughts
Learning how to fix a sagging door is really about understanding alignment, not force. Most problems come from small issues—loose screws, weak wood, or slight shifts over time.
Once you fix those, the door usually becomes as good as new. The key is patience and doing steps in the right order, not rushing to cut or replace parts.
A sagging door may feel like a nuisance, but with the right approach, it becomes one of the easiest home fixes you can master.