


Introduction
Wall damage happens in almost every home. Whether it’s from moving furniture, a door handle hitting the wall, hanging shelves, or accidental impacts, holes in walls can make a room look unfinished and neglected.
The good news is that learning how to fix a hole in the wall is much easier than most people think. With a few basic tools and materials, you can repair small dents, medium-sized holes, and even larger damaged areas without hiring a professional.
As many DIY experts say, “A small repair today prevents a bigger renovation tomorrow.” Taking care of wall damage early keeps your home looking clean and well-maintained.
This guide explains how to fix a hole in the wall using simple methods that anyone can follow.
Why Wall Holes Should Be Repaired Quickly
Even a small hole can create bigger issues over time.
When left unrepaired, holes can:
- Collect dust and dirt
- Allow moisture to enter drywall
- Make paint look uneven
- Reduce the appearance of the room
- Increase repair costs later
Fixing the damage early helps preserve both the wall and the overall appearance of your home.
Understanding Different Types of Wall Holes
Before learning how to fix a hole in the wall, it’s important to identify the size of the damage.
Small Holes
These are usually caused by:
- Nails
- Screws
- Picture hooks
- Thumbtacks
Small holes are typically less than half an inch wide.
Medium Holes
These may result from:
- Door handles
- Minor accidents
- Furniture impacts
They are generally between 1 and 6 inches wide.
Large Holes
Large holes often happen because of:
- Plumbing repairs
- Electrical work
- Strong impacts
- Accidental damage
These repairs usually require a drywall patch.
Tools and Materials You May Need
Gathering supplies before starting makes the process much easier.
Common materials include:
- Spackling compound
- Joint compound
- Putty knife
- Sandpaper
- Drywall patch
- Utility knife
- Paint
- Primer
- Drywall tape
- Drywall screws
Having everything ready helps the repair go smoothly from start to finish.
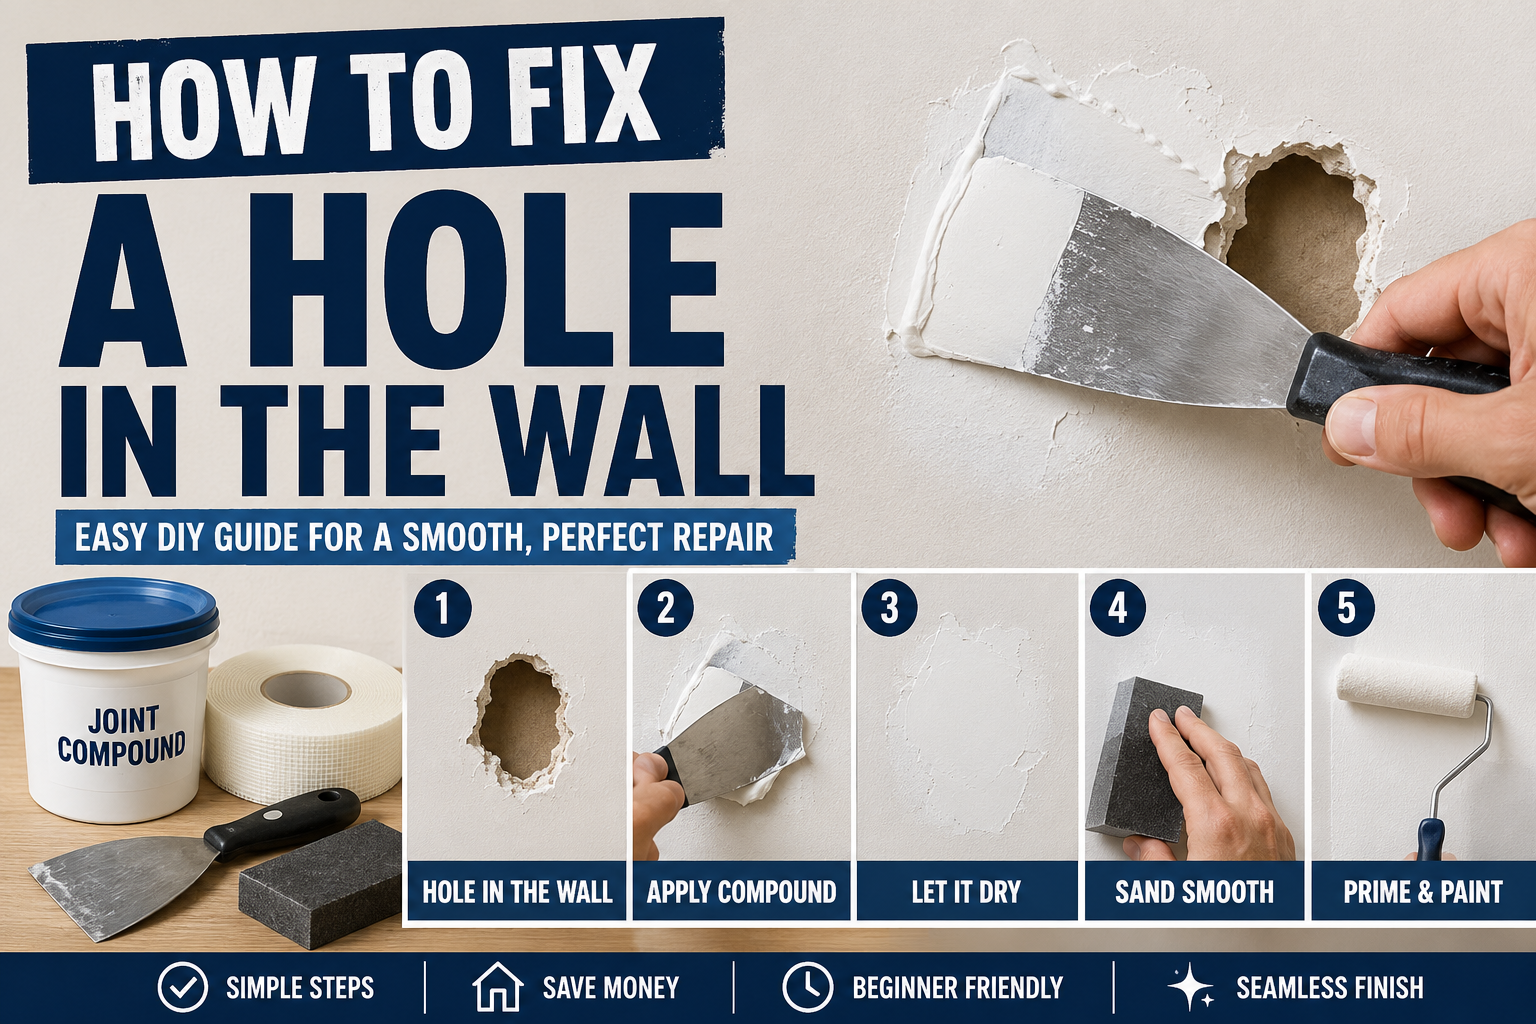
How to Fix a Small Hole in the Wall
Small nail and screw holes are the easiest repairs.
Step 1: Clean the Hole
Remove any loose drywall, dust, or debris.
A clean surface allows the filler to bond properly.
Step 2: Apply Spackling Compound
Use a putty knife to press spackling compound into the hole.
Spread it evenly across the damaged area.
Step 3: Let It Dry
Follow the drying time recommended by the manufacturer.
Most products dry within a few hours.
Step 4: Sand Smooth
Use fine-grit sandpaper to create a smooth surface.
The repaired area should blend into the wall.
Step 5: Prime and Paint
Apply primer first, then match the wall color with paint.
After painting, the repair should be nearly invisible.
This is the fastest method for how to fix a hole in the wall when dealing with small damage.
How to Fix a Medium Hole in the Wall
Medium-sized holes require additional support.
Step 1: Prepare the Area
Remove loose drywall around the edges.
Trim rough sections using a utility knife.
Step 2: Install a Self-Adhesive Patch
Place a mesh drywall patch over the hole.
Ensure it completely covers the damaged area.
Step 3: Apply Joint Compound
Spread joint compound over the patch.
Use smooth strokes to feather the edges.
Step 4: Allow Drying Time
Wait until the compound is completely dry.
Patience during this stage improves the final result.
Step 5: Sand and Repeat if Necessary
Some repairs need a second coat.
Sand lightly between coats for a smooth finish.
Step 6: Paint the Wall
Prime the repaired section before painting.
This method is one of the most common solutions for how to fix a hole in the wall when the damage is too large for simple spackle.
How to Fix a Large Hole in the Wall
Large holes require replacing a section of drywall.
Although the process takes longer, it’s still manageable for many homeowners.
Step 1: Cut a Square Around the Damage
Use a drywall saw to create clean edges.
A square shape makes patching easier.
Step 2: Create a Matching Drywall Patch
Cut a new piece of drywall to fit the opening.
Measure carefully for the best results.
Step 3: Add Support Behind the Wall
Attach wooden backing strips inside the wall cavity.
These supports help hold the patch securely.
Step 4: Secure the Patch
Use drywall screws to fasten the new drywall piece.
Ensure it sits flush with the existing wall.
Step 5: Apply Drywall Tape
Cover all seams with drywall tape.
This prevents cracks from appearing later.
Step 6: Apply Joint Compound
Spread several thin layers rather than one thick layer.
Thin coats create a smoother finish.
Step 7: Sand, Prime, and Paint
After the final coat dries, sand the area smooth.
Apply primer and paint to match the surrounding wall.
Learning how to fix a hole in the wall properly ensures the repair remains strong and nearly invisible.
Common Mistakes to Avoid
Many DIY repairs fail because of small mistakes.
Avoid these common issues:
Using Too Much Compound
Thick layers take longer to dry and often crack.
Multiple thin layers produce better results.
Skipping Sanding
A rough repair becomes noticeable after painting.
Always smooth the surface before finishing.
Forgetting Primer
Primer helps paint blend evenly.
Without it, patched areas may stand out.
Rushing the Process
Drying times matter.
Waiting between coats creates a stronger and cleaner repair.
Matching Paint After the Repair
Even a perfect patch can be obvious if the paint doesn’t match.
To achieve a seamless appearance:
- Use leftover original paint if available
- Match the paint finish (matte, satin, gloss)
- Paint slightly beyond the repaired area
- Blend edges carefully
A good paint match often determines whether anyone can spot the repair.
Repairing Holes in Plaster Walls
Older homes often have plaster instead of drywall.
The repair process is similar but requires extra care.
Small plaster holes can be filled with patching compound.
Larger damage may need plaster repair products specifically designed for historic or older walls.
When working with plaster, remember the saying, “Slow and steady repairs create lasting results.”
When to Call a Professional
Some situations may require professional help.
Consider hiring an expert if:
- The hole is extremely large
- Structural framing is damaged
- Water damage is present
- Mold is visible
- Electrical wiring is exposed
Professional repairs may cost more, but they can prevent larger issues later.
Preventing Future Wall Damage
Once you’ve learned how to fix a hole in the wall, it makes sense to prevent future damage.
Helpful prevention tips include:
- Install door stoppers
- Use proper wall anchors
- Avoid overloading shelves
- Move furniture carefully
- Secure heavy wall decorations
These simple habits can save time and repair costs.
Cost of Fixing a Hole in the Wall
Repair costs depend on the size of the damage.
Small Holes
- DIY Cost: $5–$20
- Professional Cost: $50–$150
Medium Holes
- DIY Cost: $15–$50
- Professional Cost: $100–$300
Large Holes
- DIY Cost: $30–$100
- Professional Cost: $250–$800+
Doing the work yourself can significantly reduce expenses.
Frequently Asked Questions
Can I repair a wall hole without a patch?
For very small holes, yes. Spackling compound is usually enough.
For larger holes, a patch provides better strength and durability.
How long does a wall repair take?
Small repairs may take less than an hour of work.
Larger repairs can take one or two days because of drying times.
Can I paint directly over the patch?
It’s best to use primer first.
Primer creates a consistent surface for paint.
What is the easiest method for how to fix a hole in the wall?
For nail holes and minor damage, filling with spackle, sanding, and painting is the easiest approach.
Final Thoughts
Knowing how to fix a hole in the wall is a valuable skill that every homeowner can benefit from. Whether you’re dealing with a tiny nail hole or a larger section of damaged drywall, the repair process is usually straightforward when you use the right materials and techniques.
The key is patience. Clean the area, apply the correct patching material, allow sufficient drying time, sand carefully, and finish with matching paint. These simple steps can transform a damaged wall into a smooth, professional-looking surface.
As the saying goes, “Good repairs are the ones nobody notices.” With a little effort and attention to detail, you can restore your wall and keep your home looking its best for years to come.